SD-CARD MODULE
We use the SD- card every day We need an SD-card for storage purposes. Now that we know how to use an h-bridge, and Bluetooth module, we can now start doing some different functions. We know that an Arduino can hold an only small amount of data and hence, it cannot be used to play videos, audio etc.The main reason we use an Arduino is, to help us to manipulate files with more data, or in short help us store data.
How does an SD-card module work
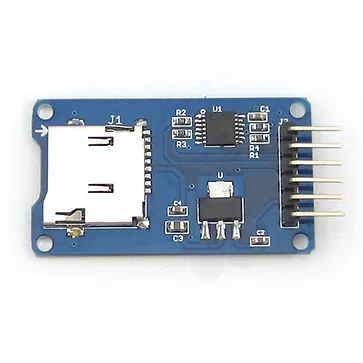
An SD-card module can be used as an interface between Arduino and the SD-card. When we give some or send some information from the Arduino board to the SD-card, it receives the information and gives an appropriate output.
Connections for Arduino Uno/nano
CS-pin to pin no. 4 on Arduino.
SCK- pin to pin no.13 of Arduino.
MOSI pin to pin no. 11 of Arduino.
MISO pin to pin no. 12 of Arduino.
VCC pin to 5v and GND to GND.
Connections for Arduino Leonardo
CS-pin to pin no. 10 on Arduino.
SCK- pin to ICSP pin of Arduino.
MOSI pin to ICSP pin of Arduino.
MISO pin to ICSP pin with resistance of 330 ohms to Arduino.
VCC pin to 5v and GND to GND.
THE CODE TO READ/ WRITE FILES
#include <SD.h>
#include <SPI.h>
int cs = 4;
File file;
void setup()
{
Serial.begin(9600);
initializeSD();
createFile("test.txt");
writeToFile("This is sample text!");
closeFile();
openFile("prefs.txt");
Serial.println(readLine());
Serial.println(readLine());
closeFile();
}
void loop()
{
}
void initializeSD()
{
Serial.println("Initializing SD card...");
pinMode(cs, OUTPUT);
if (SD.begin())
{
Serial.println("SD card is ready to use.");
} else
{
Serial.println("SD card initialization failed");
return;
}
}
int createFile(char filename[])
{
file = SD.open(filename, FILE_WRITE);
if (file)
{
Serial.println("File created successfully.");
return 1;
} else
{
Serial.println("Error while creating file.");
return 0;
}
}
int writeToFile(char text[])
{
if (file)
{
file.println(text);
Serial.println("Writing to file: ");
Serial.println(text);
return 1;
} else
{
Serial.println("Couldn't write to file");
return 0;
}
}
void closeFile()
{
if (file)
{
file.close();
Serial.println("File closed");
}
}
int openFile(char filename[])
{
file = SD.open(filename);
if (file)
{
Serial.println("File opened with success!");
return 1;
} else
{
Serial.println("Error opening file...");
return 0;
}
}
String readLine()
{
String received = "";
char ch;
while (file.available())
{
ch = file.read();
if (ch == '\n')
{
return String(received);
}
else
{
received += ch;
}
}
return "";
}
This piece of code demonstrates how to open, close, create or use the file in any manner.
THE CODE TO PLAY AUDIO FILES
#include <SD.h> //include SD card module library
#include <TMRpcm.h> //include speaker library
#define SD_CSP 10 //define CS pin
TMRpcm tmrpcm; //crete an object for speaker library
void setup()
{
tmrpcm.speakerPin = 9; //define speaker pin
if (!SD.begin(SD_CSP))
{ //see if the card is present and can be initialized
return;
}
tmrpcm.setVolume(5.95); //0 to 7. Set volume(Keeping it kind of low works well because its only 8 bit audio)
Serial.begin(9600);
}
void loop()
{
if(Serial.available()>0)
{
int i= Serial.read();
if(i=='1')
{
tmrpcm.play("1.wav"); //the wav file'1' plays
}
if(i=='2')
{
tmrpcm.play("2.wav"); //the wav file'2' plays
}
if(i=='3')
{
tmrpcm.play("3.wav"); //the wav file'3' plays
}
if(i=='4')
{
tmrpcm.play("4.wav"); //the wav file'4' plays
}
if(i=='5')
{
tmrpcm.play("5.wav"); //the wav file'5' plays
}
}
}
THE CODE TO PLAY AUDIO FILES(simple)
#include <SD.h> // need to include the SD library
//#define SD_ChipSelectPin 53 //example uses hardware SS pin 53 on Mega2560
#define SD_ChipSelectPin 4 //using digital pin 4 on arduino nano 328, can use other pins
#include <TMRpcm.h> // also need to include this library...
#include <SPI.h>
TMRpcm tmrpcm; // create an object for use in this sketch
void setup(){
tmrpcm.speakerPin = 9; //5,6,11 or 46 on Mega, 9 on Uno, Nano, etc
Serial.begin(9600);
if (!SD.begin(SD_ChipSelectPin)) // see if the card is present and can be initialized:
{
Serial.println("SD fail");
return; // don't do anything more if not
}
tmrpcm.play("music"); //the sound file "music" will play each time the arduino powers up, or is reset
}
void loop()
{
if(Serial.available())
{
if(Serial.read() == 'p'){ //send the letter p over the serial monitor to start playback
tmrpcm.play("music");
}
}
}


Comments
Post a Comment